Making Pottery - How it all works!
Part 1. Materials and Tools. Originally posted September 26, 2022.
Hi pottery friends! Today's theme of educational posts (for Lori's annual sale and the Frederick Art Walk) is the materials and tools that Lori uses.
You will all have heard about potter's wheels, and almost certainly seen one used in the movie Ghost! Some wheels are powered by foot - called kick wheels - but most are electric. They are pretty simple. A motor drives a belt and a pulley, which turns the wheel. There's a speed control operated by foot. Lori's is unique in that the drive belt is actually 4 belts, so that if one snaps (as it did 2 weeks ago), she can carry on.
One could throw a pot directly on the wheel head, but more commonly a wooden "bat" is attached, and the pot is made on that, so it can easily be removed. Another tool, a "Giffin Grip" may be placed on the wheel head. It can be adjusted to hold a partially-finished pot steady as it turns, while the potter does some additional work on it.
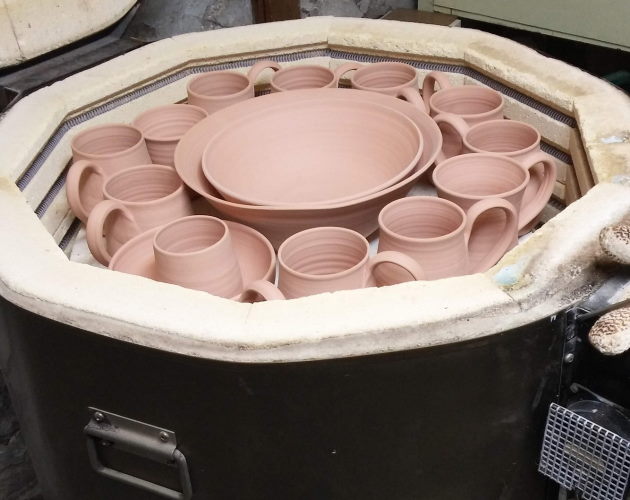
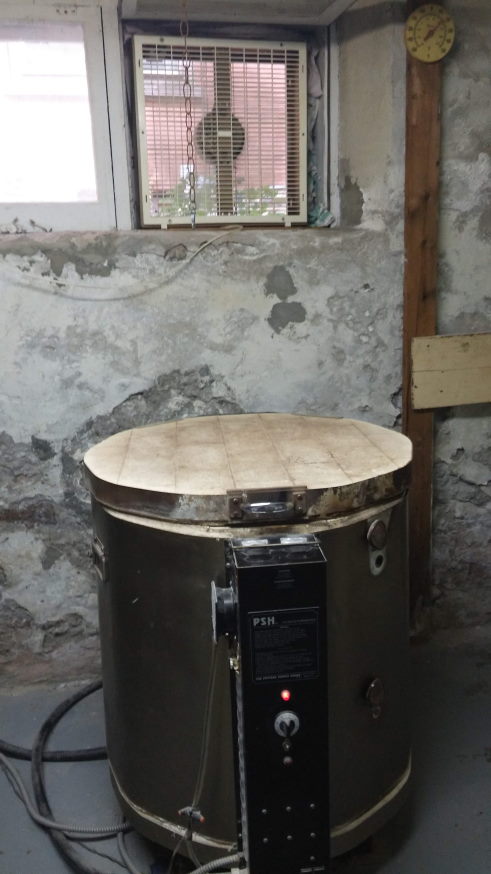
Then there's the kiln, about which much more will be said below. There are electric kilns, and gas kilns, and even wood and solar kilns. Lori's is round, about 22" across and 26" deep, and pots are loaded in the top, on 3/4" shelves. The shelves are separated by "stilts", placed 120 degrees apart around the edge of the shelf. A kiln will typically have 5 to 7 shelves in a given firing. Pots are fired twice in the kiln.
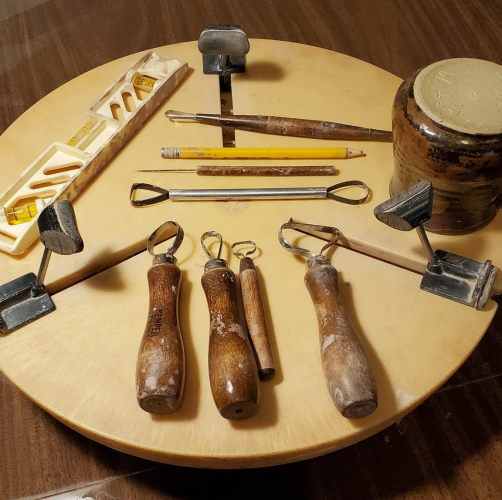
There's an arsenal of hand tools for scraping, slicing, poking, carving, digging, sanding, brushing, spraying. You will see lots being used in various pictures. Oh, and my super big, stainless steel, cookie making bowl - that somehow ended up living in the glaze room. And even more electric tools for grinding - like a Dremel tool and special diamond grinding wheel - and hand blenders for mixing glazes. Thanks Faraday, for electricity!
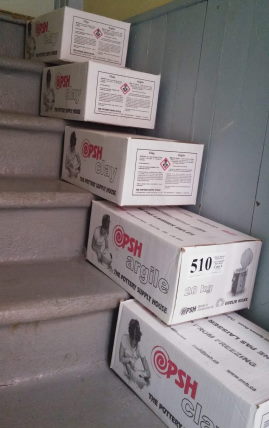
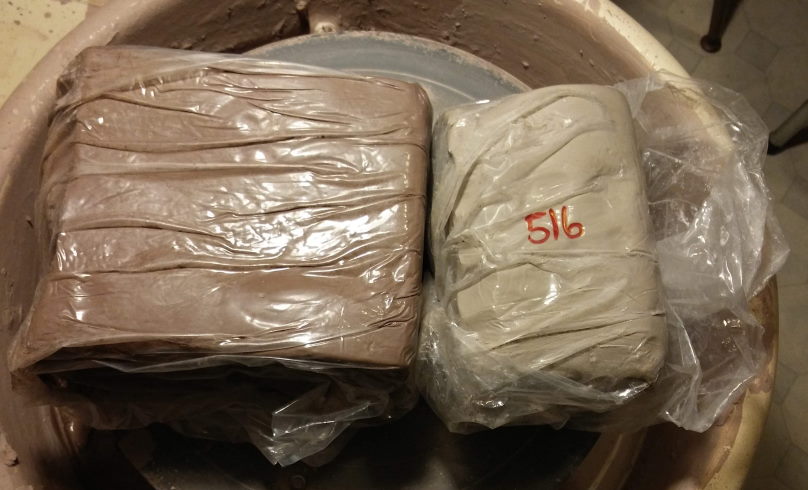
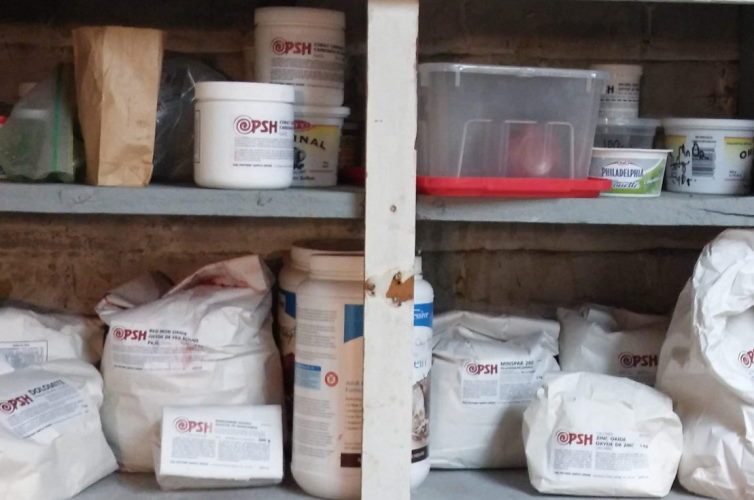
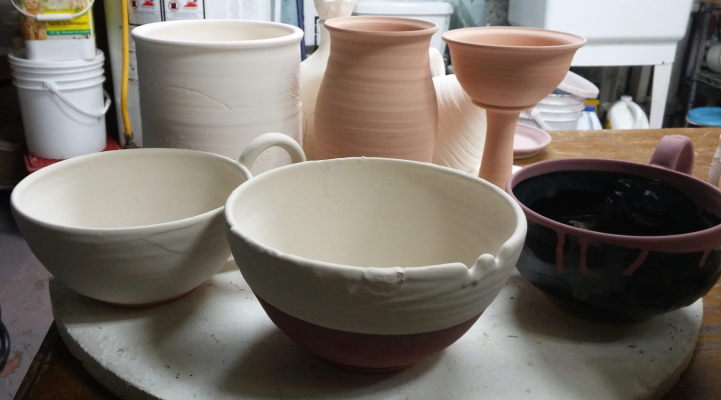
Material? Well, there's the "dirt" of course. There are many kinds of clay, but Lori uses brown and white "high fire stoneware".
We get it by the 40 pound box, usually 5 or 6 at a time. Every supplier has their own recipes, and Lori's favourite is called 510,
from Pottery Supply House in Oakville (and S&S Pottery in Kitchener).
It's dug by hand out of south-facing ocean cliffs, by left-handed elves, only on May 10, under a new moon. That's why it's called "510". Honest.
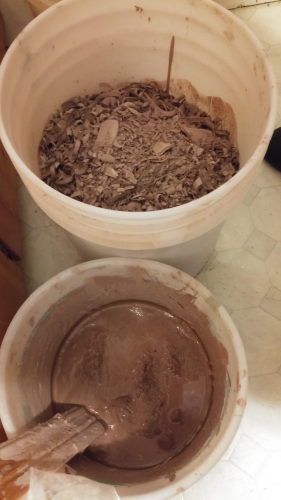
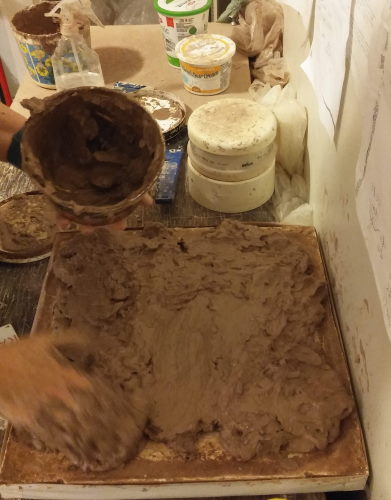
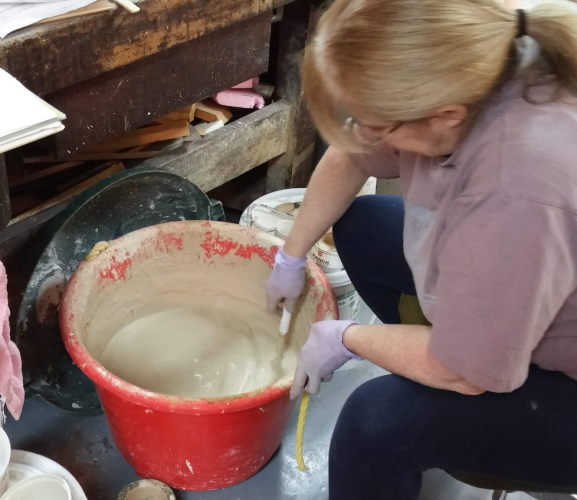
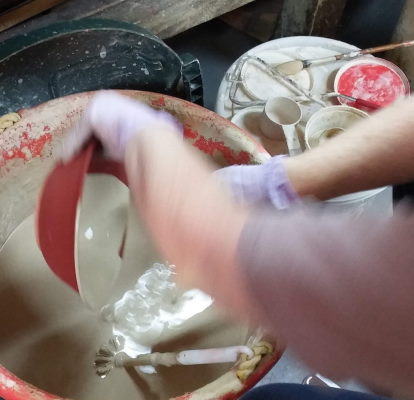
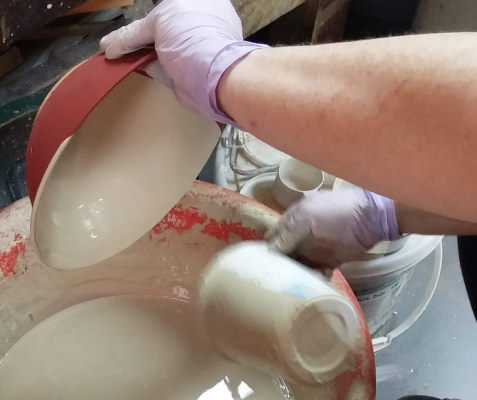
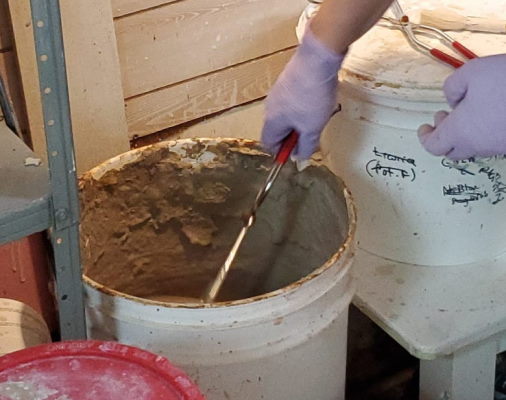
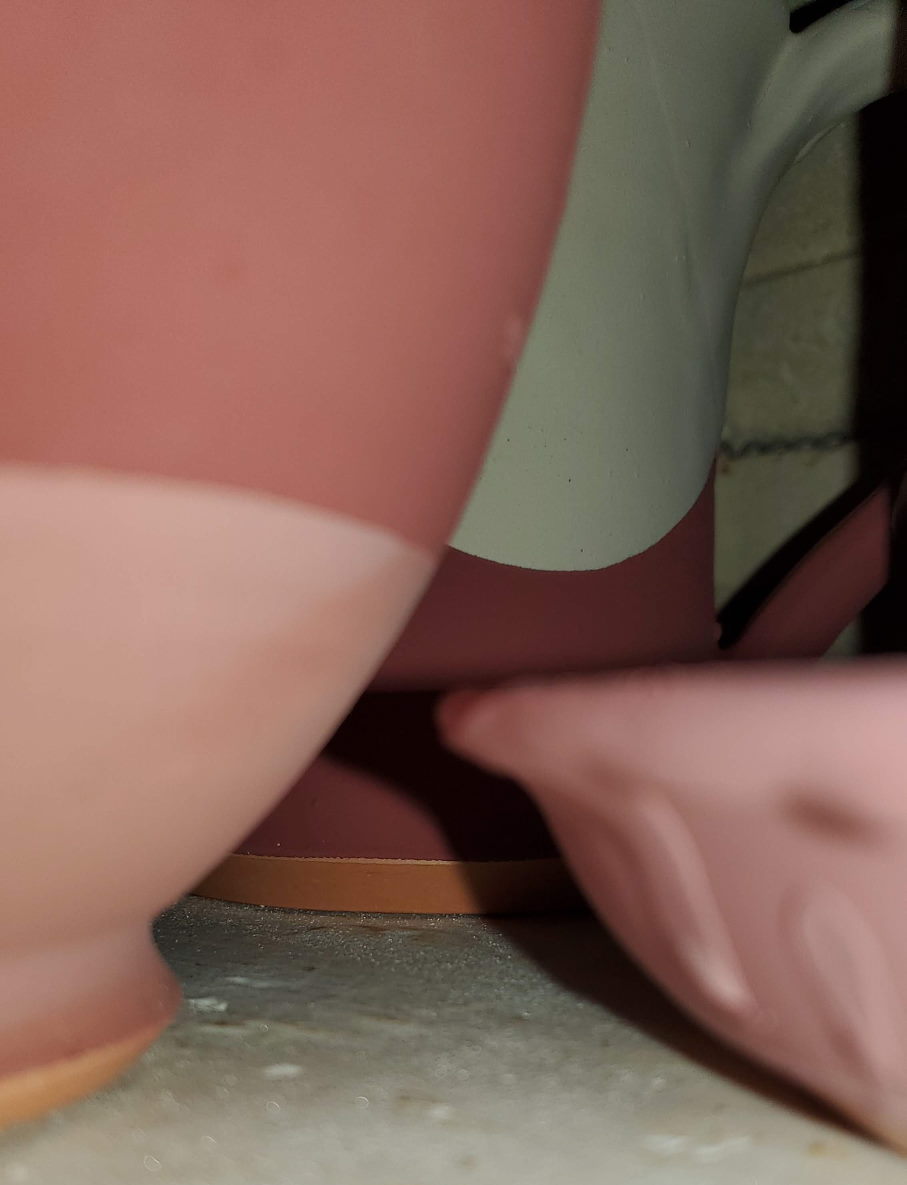
Then there's "reclaim" which is the leftover bits and pieces that are trimmed away while shaping the pots. Lori stores it by the bucketful, softens it in water, and eventually "slabs" it out to dry on Plaster of Paris squares (which she made eons ago in pizza boxes). The plaster pulls the moisture out of the clay and makes it useable again. The reclaim is softer and more pliable, and Lori's biggest bowls are made of reclaim. A 40 pound box of clay might result in 10 pounds of reclaim, so it's worth saving!
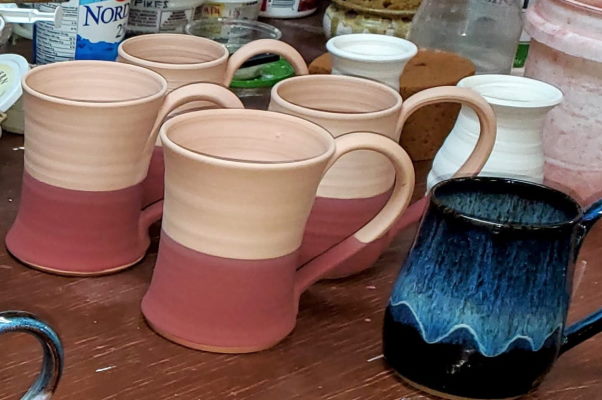
Bisqued pots are waxed and then glazed, which are mutually exclusive. That is - wax is applied by brush to the parts of the pot that are not to be glazed. That's usually the bottoms, but also the contact points of the lids on closed pot. If those spots received glaze, then they would fuse themselves together, and Oh! what a mess.
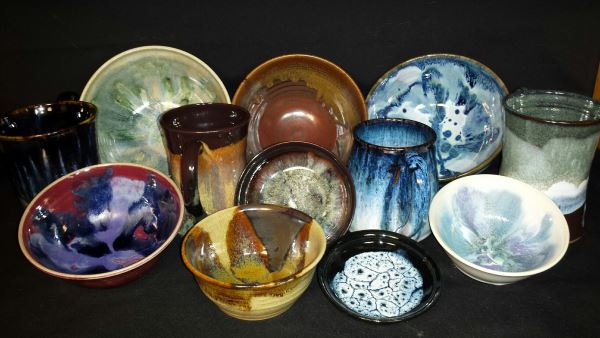
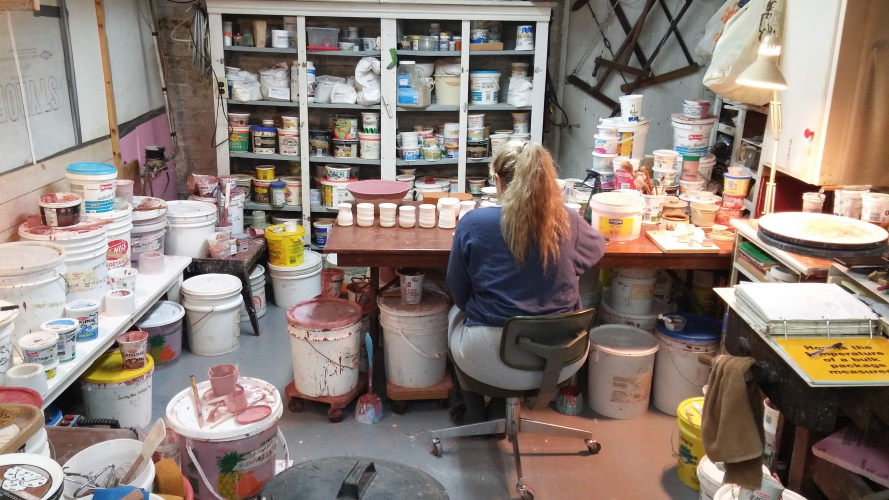
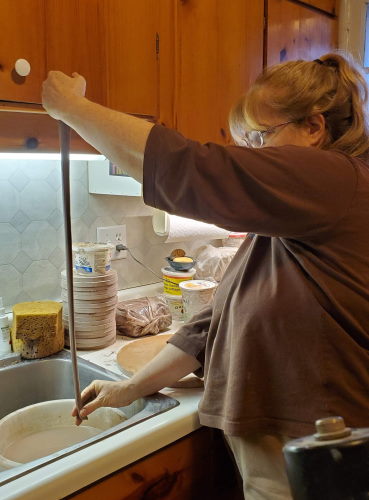
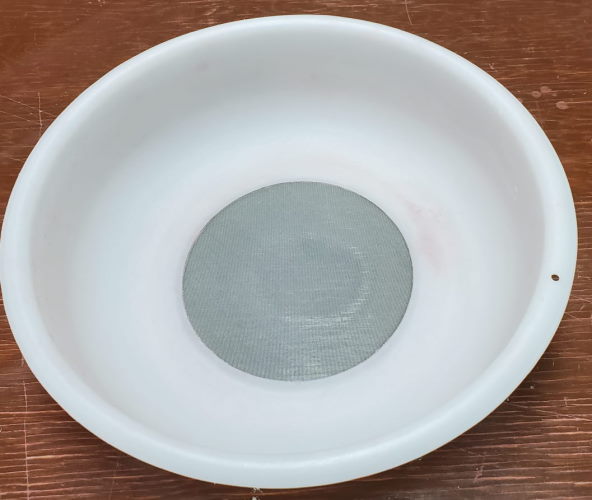
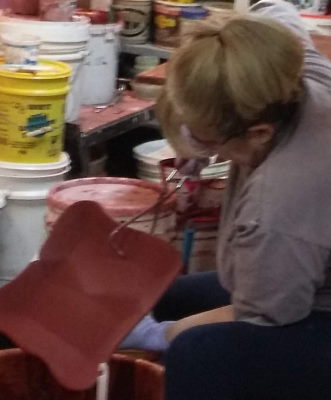
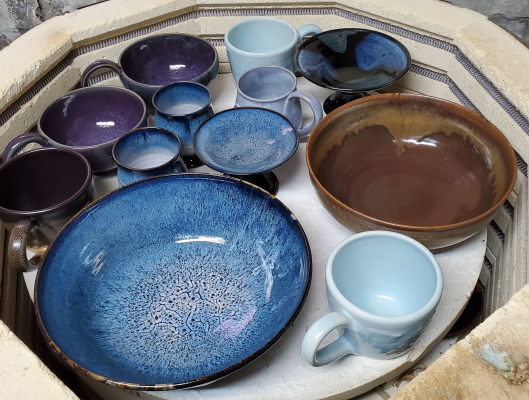
Colours come from glazes. Where do glazes come from? From Lori! Some potters will purchase them already made, but Lori develops and makes all her glazes. Using plain water and fancy powders - some dull, some very bright - and with her secret recipe book, chants, and magic Sieve, she fills her buckets with Opal, Serious Blue, Chocolate, Tenmoku, Stone, Chester, and many more. I will talk at length about glazes a bit later.
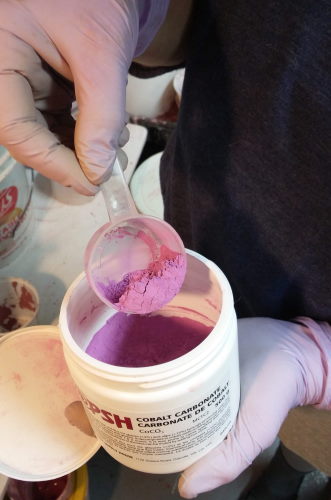
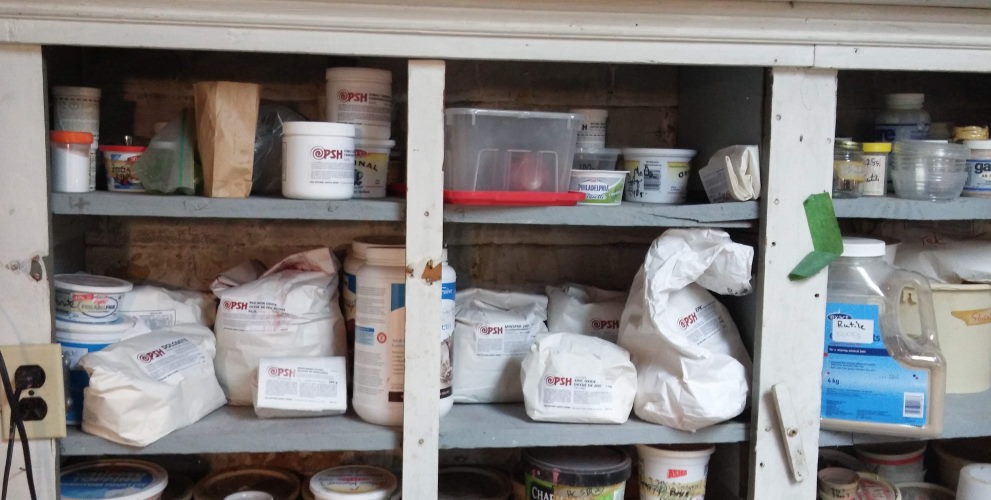
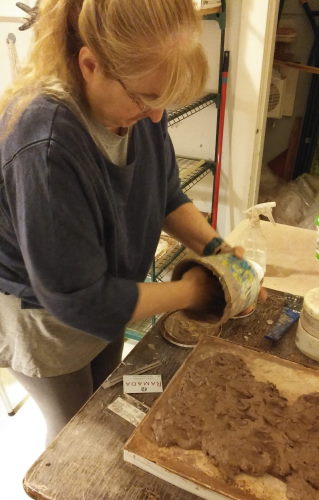
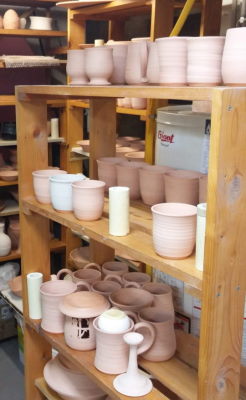
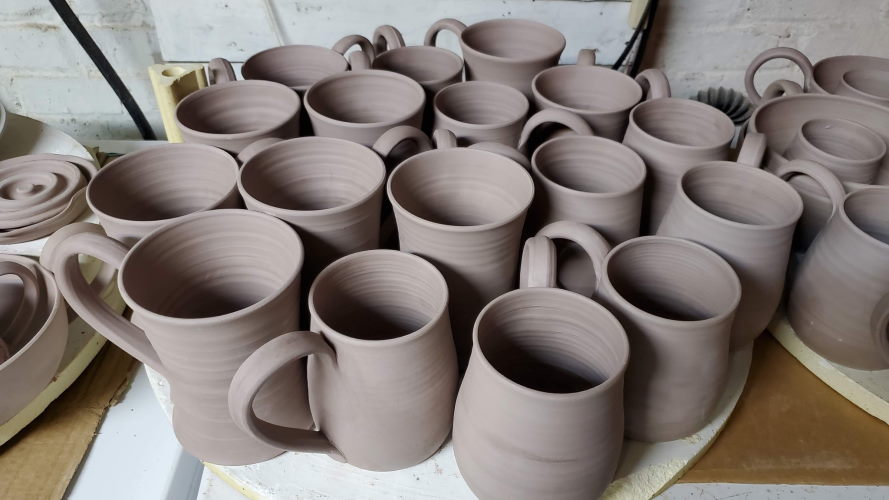
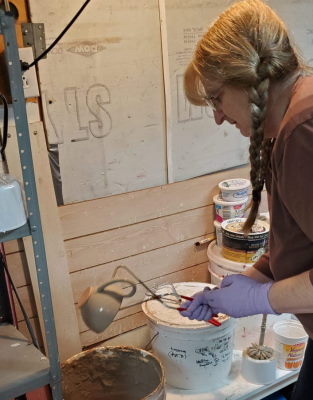
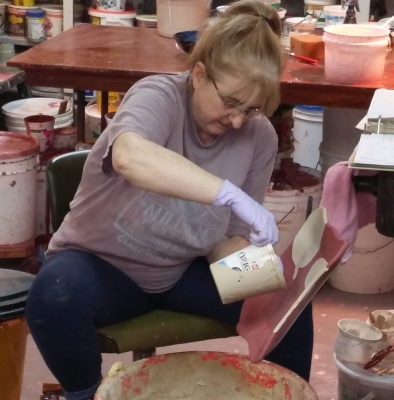
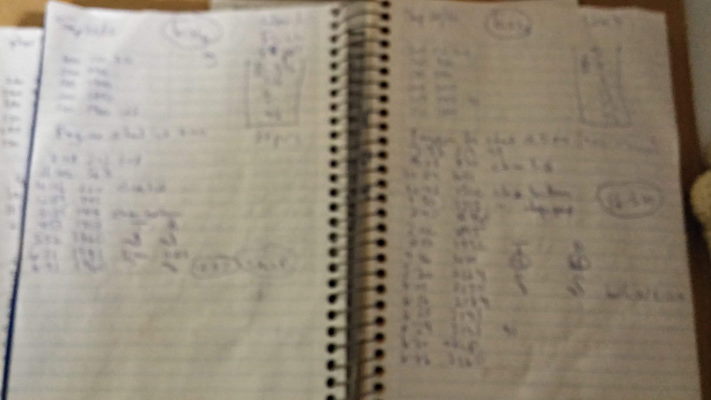
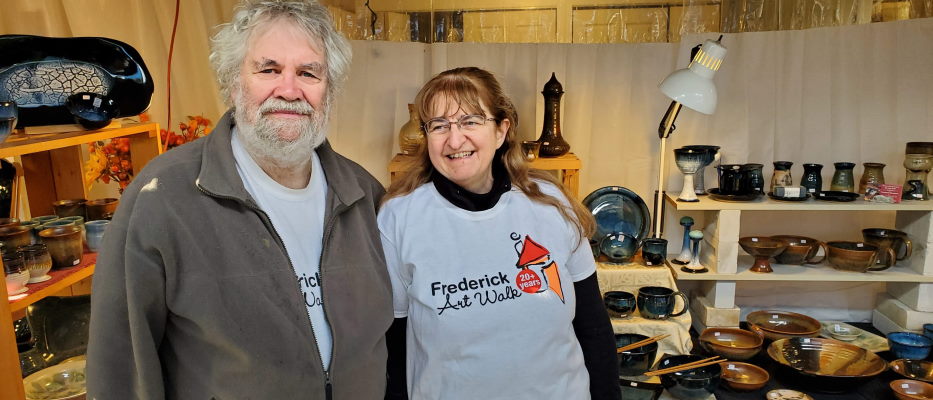
The pictures above show those various materials. The last one is Lori in front of her glazing table, buckets of glaze around her, and a cupboard of glaze materials in front of her. Yes, our basement looks like this in pottery season! At the the other end - in front of the water heater that we had to replace a week ago (timing is everything) - are shelves and shelves FULL of pots in process, which I will talk about next time! Thanks for reading!
Part 2. Throwing A Mug. Originally posted September 29, 2022.
Hi again FB friends! This week's theme" of educational posts (for Lori Cole's sale and the Frederick Art Walk) continues with Part 2, the processes behind making pottery!
If you've followed my posts over the years, you've seen a lot of behind-the-scenes stuff, but let's start at the beginning. First, Lori has to decide what she's making, which is maybe the toughest part of all! Then she weighs out an appropriate amount of clay: a large mug starts with 1.5 pounds, a medium bowl starts with 4 pounds! Here are the "simple" steps to make a mug.
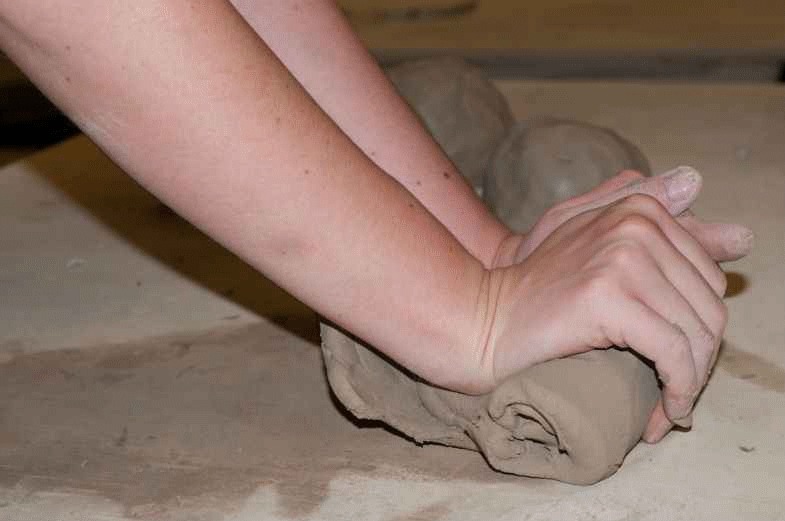
Lori starts by "wedging", which means kneading the clay like a very dense bread dough, to "align the clay particles", make it consistent throughout, and remove any air bubbles that might linger into the thrown pot, and then explode in the kiln! Wedging takes strength and patience - imagine kneading several pounds of bread dough - and is not Lori's favourite part.
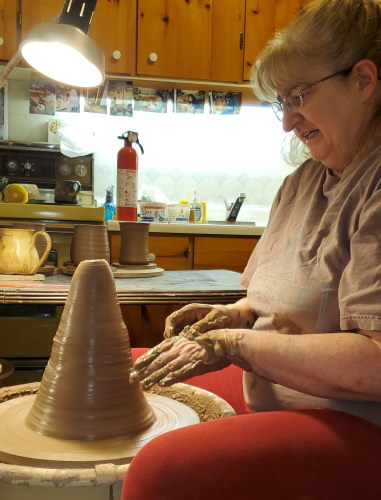
Lots of practice is important next, because now the chunk of clay must be "centred" - positioned at the exact centre of rotation of the wheel. Perfect centring is absolutely critical. With wet hands and a lot of force, potters work and re-shape the mass of clay until they have a perfectly centred cone or "hockey puck", one that doesn't wobble as the wheel turns. The picture below left shows about 8 pounds of clay, enough for a bowl.
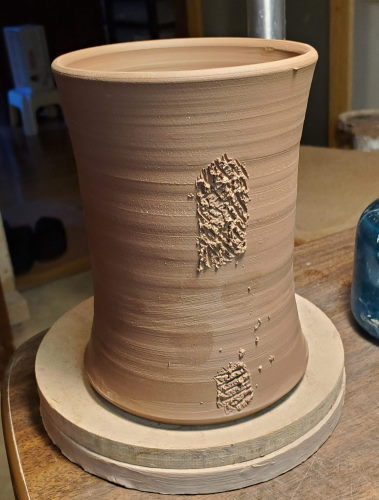
Forming that centered puck into a shapely cylinder involves opening up the middle, compressing the bottom, and pulling up the sides - over and over again. Rather than try to explain it further, here's a video of Lori making the body of a mug, beginning partway through centring.
That's your homework. I'll pick up from here next time, with handles! (Get it? Pick up? Handles?)
Back to topPart 3. Handles. Originally posted October 2, 2022.
Friday's instalment of "As The Wheel Turns" got us as far as a mug without a handle, sitting on a small wooden bat. We pick up our story with the handles.
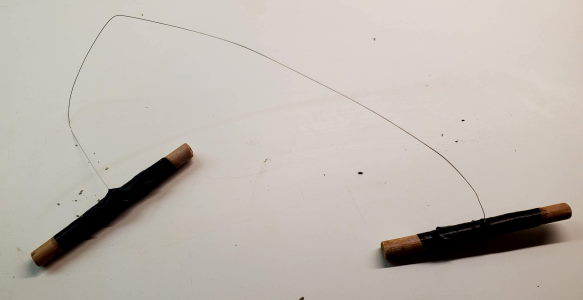
After the mug dries for a bit, Lori takes a garrotte (made from a high E guitar string; MY contribution to her toolkit) and carefully cuts the mug body from the wooden bat. If she cuts too high, she will take the bottom right out of the mug; then it might become a beautiful carved candle holder! The garrotte is just one of many special (i.e. frightening) tools that Lori uses - her collection would make a dentist proud!
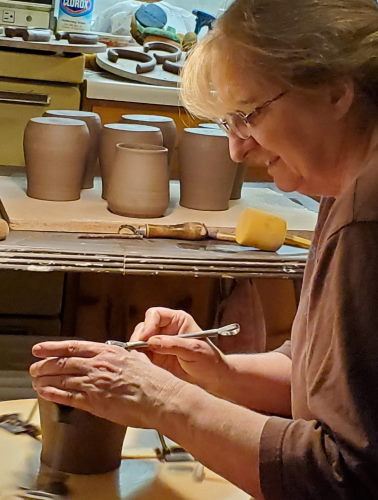
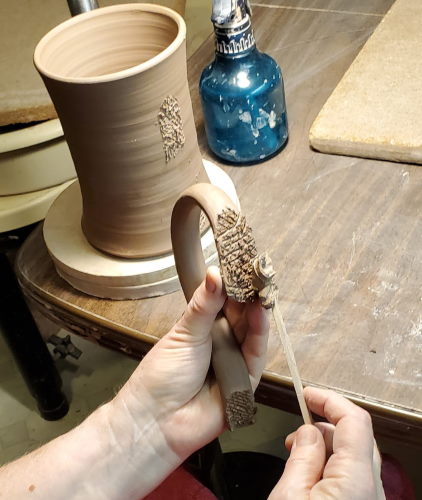
After a day or two of drying (but misting the rim to keep it pliable), Lori inverts the mug on her "Giffin Grip" (above), which holds it centered in place, and carefully trims the excess clay from the mug's bottom. "Trimming" gives the mug bottom its shape and final strength and thickness. This is the main source of the trimmings that go into reclaim clay - see my earlier post. She signs it, and then sprays it with water and covers it with plastic in preparation to receive the handle.
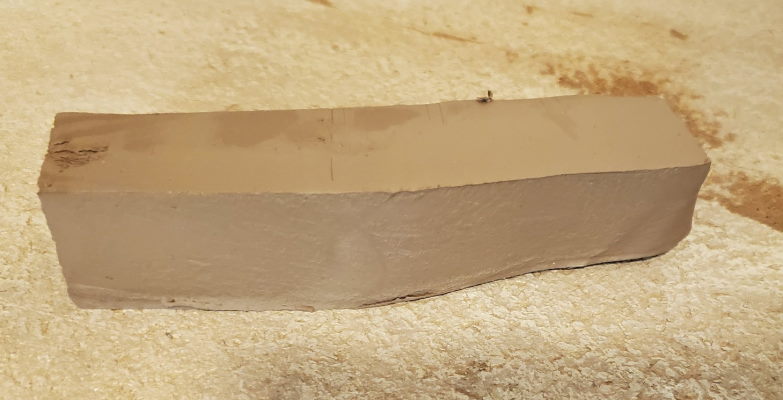
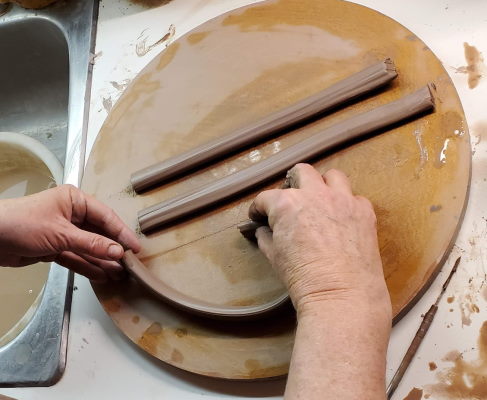
Handles are "pulled", starting as a 2x2" long brick, which is worked by hand - pulled over and over like milking a cow - into the shape of one long handle, but straight.
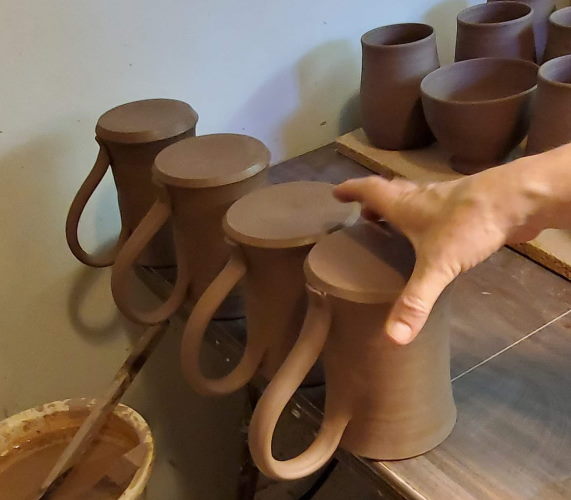
The handle pieces are then cut and formed roughly into handle shape, and allowed to dry for a couple of hours. Lori then attaches it to the mug body. Pottery attachments require the use of watery clay (called "slip"), plenty of scratching in 3 directions at all attachment points, filling the grooves with slip, and pressing and holding the pieces together. Attachments for some mugs may include a name plaque or crest on the mug body - add another hour for one of those. Finally, Lori smooths all around the joints, to make them seamless, and ensures the handle is straight on the mug.


The mugs are dried upside down for half an hour, then sprayed with water again and covered with plastic to be in a moist state for at least 12 hours before being allowed to dry thoroughly. After drying, the mug is finally ready for the first firing in the electric kiln, called the "bisque firing", which takes about 12.5 hours. Unlike a glaze kiln, pots can touch, nest, be upside down, or even on their sides! Packed as tight as possible. When they're done, the pots are solid and safe to handle. Next time I'll move on to what happens after that - glazing! By the way - total elapsed time for the mug so far is a minimum 4 days.
Part 4. Wax & Glaze. Originally posted October 4, 2022.
So our mug has spent 12.5 hours in the kiln being heated to 1960 degrees, and another 15-20 cooling back down. When it emerges from the bisque, it feels like a handful of warm desert sand. Rough, dry, and unappealing. We use sandpaper to remove some of the roughness. But all the beauty is about to happen.
While Lori's mind is churning on what glaze combinations to play with next, her hands (or mine, or a friend's) are waxing. "Wax Resist" is a liquid that you paint on the bottom of a pot, where it hardens just like candle wax. Glaze won't stick to wax, so you wax everywhere that you don't want glaze. It has to be done carefully, because a drip out of place, or some residue from you hands, will inhibit the glaze where you DO want it. If that happens, the pot is usually sent back for another bisque firing, to burn the wax off the pot. Pots with lids (etc) require waxing wherever the parts touch, so that glaze doesn't join them together.

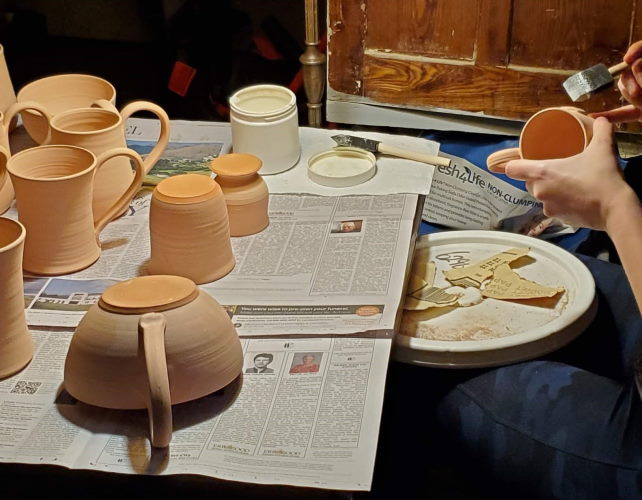
It can be tricky at times, but waxing is very peaceful and contemplative. Glazing, on the other hand, is more like a hurricane. Today I'll explain ABOUT glazes, and document the storm next time.
When Lori first got her kiln and started firing in the basement, there would always be a few pots that "pinged" as they cooled. Sometimes, even days later, they would give off another loud ping. And sometimes a ping would be fatal, the dying sound of a breaking pot. What's going on here?
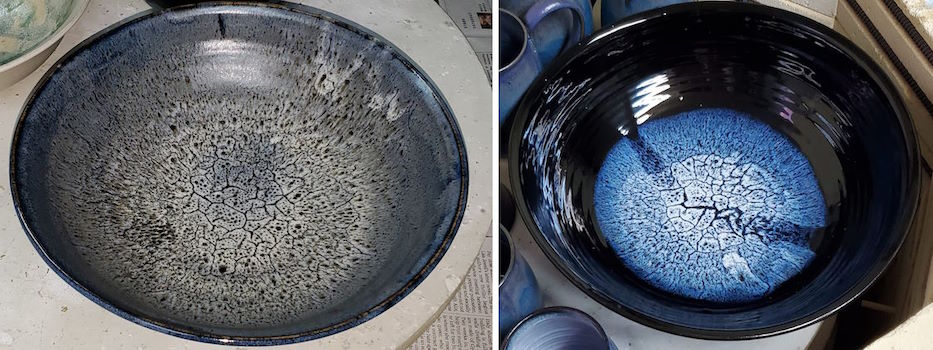
Well, here's what happens. Glaze starts as a soup of chemicals, but once it's been fired in the kiln, it's a glass-like, solid coating on the clay. As a pot cools from the kiln it shrinks a little bit. The clay shrinks at a certain rate, and the solid glaze shrinks at a certain rate. The rates are called Coefficients of Thermal Expansion, or CTEs. A potter (mathematically or experimentally) must match the CTE of her clay with the CTE of her glazes, so that they shrink at the same rate, and are "happy together". But a new potter, inventing her own glazes and trying out different clays, won't always have it right. The pings are the release of stress that builds higher and higher, as the pot and its coating shrink at different rates. (Picture below right from https://digitalfire.com/picture/8mXP5aB7Sn)
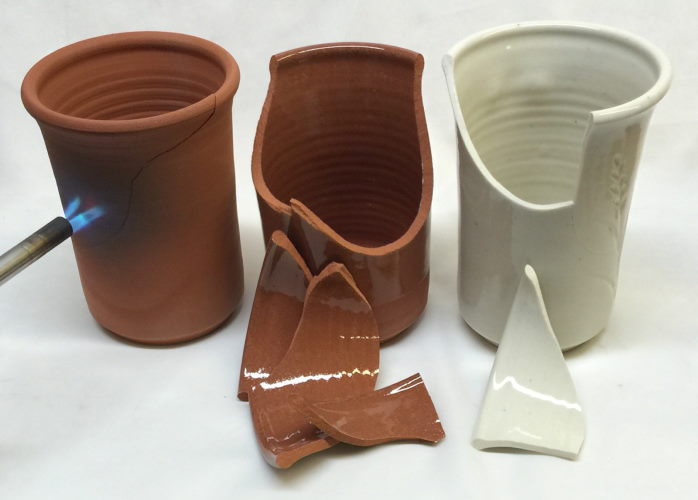
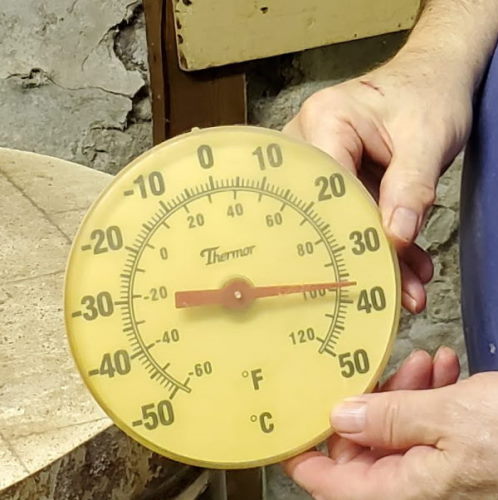
DON'T TRY THIS AT HOME, but you could do this "thermal shock" experiment, by taking a pot (that you don't like) from the fridge or freezer and putting it directly into a hot oven, or heating it with a torch, as above. Ping! Boom! VERY. NOT. RECOMMENDED.
Nowadays there are no more pings in our house, unless Lori is deliberately experimenting with a new glaze/clay combination to see what drama she can create. Drama indeed!
Eventually, the trials beget a glaze recipe. Lori has over 20 regular glazes, closely guarded secrets. Today, you can find recipes on the Internet, and they will be identified with a temperature, as will the clay they are matched with; but they will be very idiot-proof, and not too interesting!
To make glaze is to be a chemist. Lori weighs up things like gerstley borate, nepheline syenite, silica, zinc oxide, feldspar, cobalt carbonate, tin, copper carbonate, chrome, nickel, manganese, iron, and many more. Most ingredients are mined (in the dark, by near-sited dwarves), and vary from mine to mine and bag to bag, so that a tried-and-true recipe from last year will be different this year, and need adjusting by educated trial and error.

Ingredients are carefully weighed, and mixed with water and stirred. And stirred. And stirred. And let sit with the lid off to evaporate. Oh, then stirred. And blended. After enough stirring, they are "sieved" through a 1/4 mm mesh sieve, which requires lots of - stirring. Then they go back through the sieve a second time, and just like that, a glaze is ready to test.
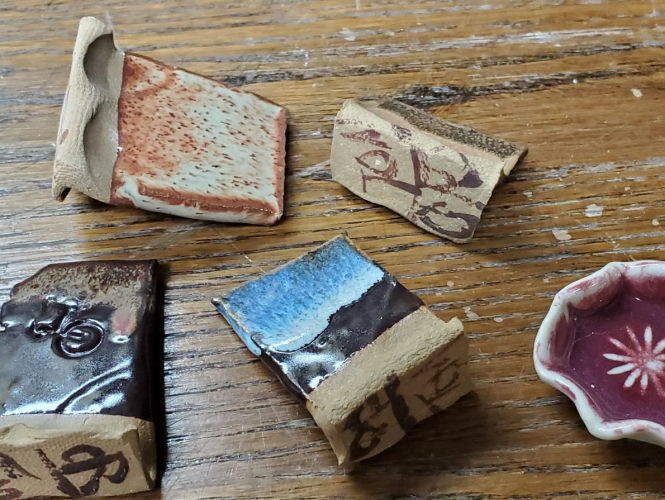
Lori uses small "test tiles" and then small test pots, while she tweaks glazes back into shape. "A little more iron, a little less flux, a touch more water, 'cause this glaze ... seems wrong!" Next time I'll have some action shots of Lori applying glaze. Don't miss those!!
Part 5. Glazing. Originally posted October 9, 2022.
Glazing is what Lori likes best. She would give up everything I've described so far, if she could somehow keep on glazing. It's where her artist comes out, not only in the glazes that she has chosen to create, and the combinations that she has invented, but also in how she applies them.
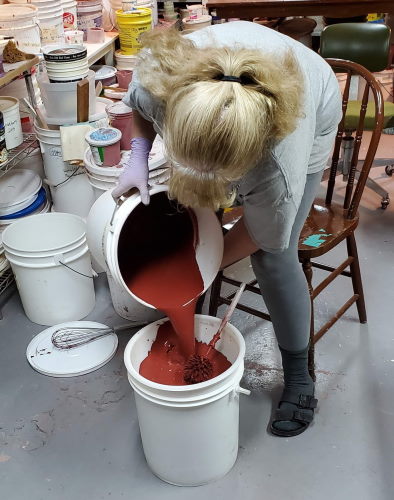
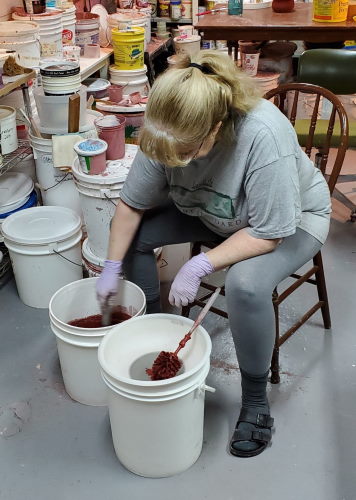
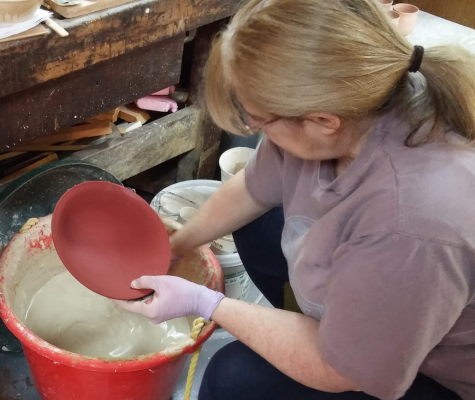
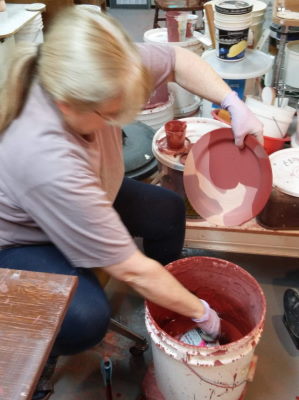
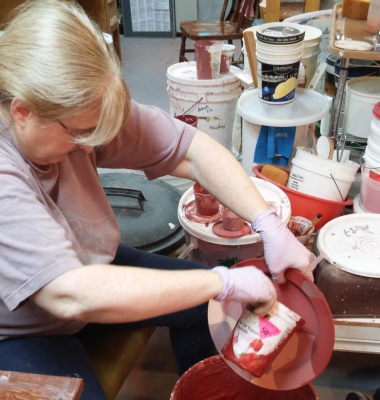
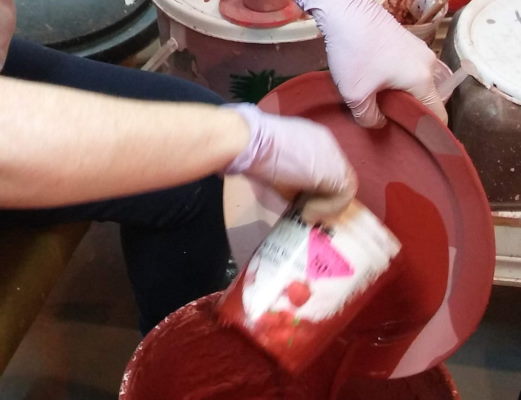
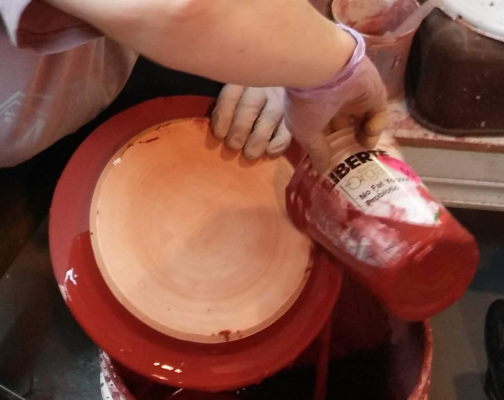
There are a bunch of techniques that Lori uses in glazing pots. Everything begins with a base glaze. The simplest way is dipping - immersing the pot into a bucket of glaze by hand, or using tongs. A piece too large to dip - or that isn’t to be completely covered - may have glaze poured over or into it, and then back out. Sometimes Lori will swirl the glaze as she dumps it back into the bucket, twisting her body into yoga positions. The thickness of the glaze matters, so timing is everything.
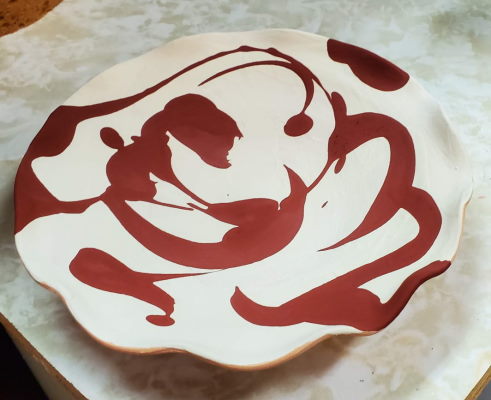
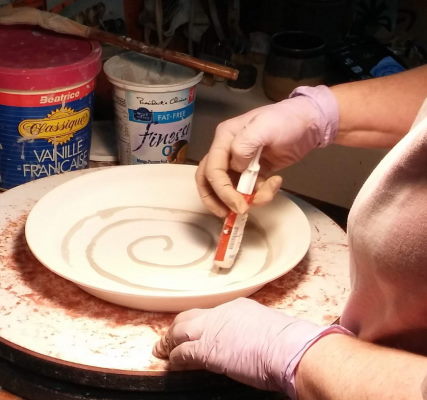
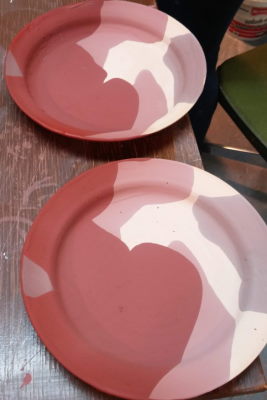
A dip or pour is usually the first step to creating drama. A pot may be dipped/poured several times, to make overlapping combinations of glazes. Decorations may be brushed, syringed, drizzled, or sponged on top of the base glaze. Or sometimes put on first, below the base glaze! Where the glaze flows onto the waxed bottom it must be sponged off, or the pot would fuse to the kiln shelf.
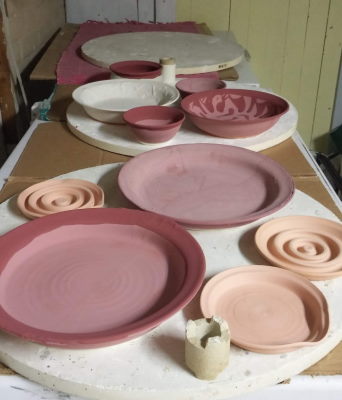
In an ideal world Lori would work her way through the stacks one pot at a time, picking a bisqued pot from the shelf, glazing it, and then moving on to the next. But space in the kiln is a VERY precious resource, so before she glazes she has to plan. We lay 5, 6, or 7 kiln shelves out in the basement, and she shuffles the unglazed pots around to cram as many of similar height onto the same shelf as possible, such that the total height of all shelves is as close to 26” as we can manage. It’s a 3D jigsaw puzzle! A good build will have less than a quarter inch of space at the top.
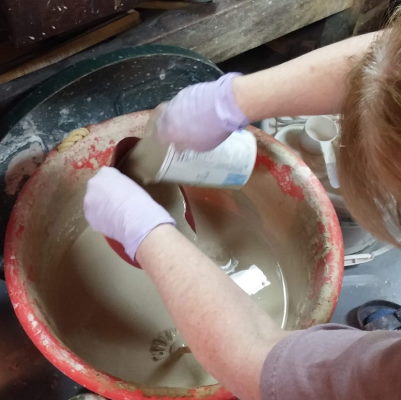
Once she knows what fits, Lori begins to glaze, and the hurricane begins! Our mug is going to have 4 or 5 different glazes applied to it, with waiting and drying times in between, so there is never a single pot being glazed at one time; more like 5 to 10. She pours a glaze into the mug and dumps it back out, stirs a bucket, dips the outside of the mug, sets it to dry, sprays some decoration onto a pair of bowls, pours into a large platter, dips the mug into its second glaze, consults her spell (glaze) books, brushes a squiggle onto a vase, blows open a hole in a candle holder, stirs a bucket, dips the rims of a pair of glasses, dips the mug again, and so on. Our mug has had about 8 days of elapsed time so far.
This goes on for many hours over 2 or 3 days, until all of the kiln shelves are full of glazed pots, and Lori climbs wearily out of the basement lair. That's when I take over. Next time I’ll explain loading and firing the glaze kiln. And then it will be time for a pottery sale!

Part 6. Glaze Firing. Originally posted October 10, 2022.
Well, we've watched Lori make a mug. It's taken her at least 8 days of elapsed time, plus 30 hours in the bisque kiln, with 37 more to come. She figures that every mug takes about 2+ hours of actual work, plus time loading and unloading kilns, cost of the clay, the glaze materials, and sundries like kiln wash (that we coat the kiln shelves with), brushes, wax resist, sandpaper, sponges. And, of course, there's the cost of electricity that turns the kiln into a small sun (twice), and the wear and tear on the kiln elements.
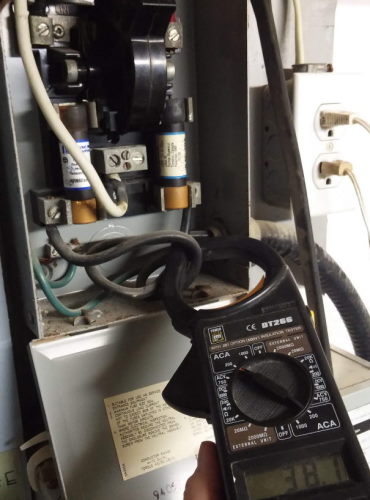
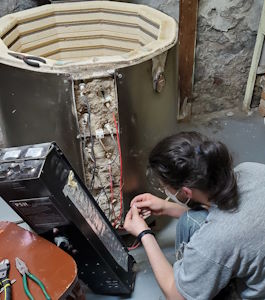
The kiln works like a giant toaster. Wire elements heat up to 'toast' the pots. But unlike a toaster, kiln elements are only good for about 70-80 uses. When our present elements were brand new in December 2017, each set of 2 drew about 47 Amps of current. Today they are pulling about 38 Amps, because the resistance of the elements has increased (remember Ohm's Law?). So it's about time to replace them again - several hundred dollars of parts, and an afternoon's work for two people. This will be the sixth set of elements since Lori bought the kiln.
Last night I loaded the kiln from Lori's original plan. First we tweaked shelf heights and moved pots around to maximize the load, and get rid of a quarter inch in total height. Yes, a quarter inch. In the process we found room for 5 more little pots, and Lori went off to glaze them while I started loading the bottom two shelves.
Glazed pots must not touch, so the loading is slow and much more meticulous than bisque. The game is to get pots as close together as possible, without touching! Simple shelves load in 4 or 5 minutes, but others take 20+ minutes, as I try to fit an extra piece in by re-arranging what's already there. I can usually get a couple more pieces in with determined effort. The cost of this effort is a lot of handling of glazed pots, so Lori has to stand by to repair any damage that I might cause. (It's ALWAYS Winter Dusk.) And sometimes, on the very last shelf, I'll say "there's room for one more pot if it's this exact shape", and she will have to come up with a piece and a quick glaze. Last night we loaded every viable piece that Lori had left on her shelves. Then I programmed the heat to come on at 5am, and headed to bed. The load took about 3.5 hours.
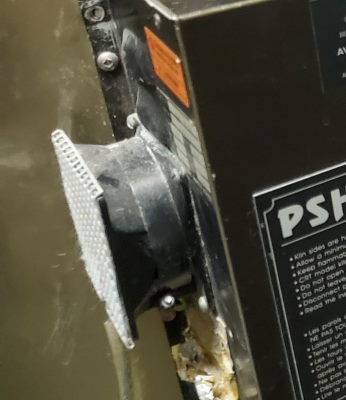
As I write this the kiln is at about 1000 degrees, on its way to 2190. We begin with the peep holes open, and the lid propped up a quarter of an inch. This lets some of the gases escape, to be blown out the window by a large fan. Speaking of fans, many years ago Lori's dad (Ed) and I installed two small fans on the metal gutter on the side of the kiln to reduce the temperature inside, where all the wiring is. Before this we were replacing burnt off wires - sometimes with the kiln in mid-bake - on a regular basis. Not one since. Touch wood! We also learned that we don't melt fuses if we crack open the fuse box during the firing.
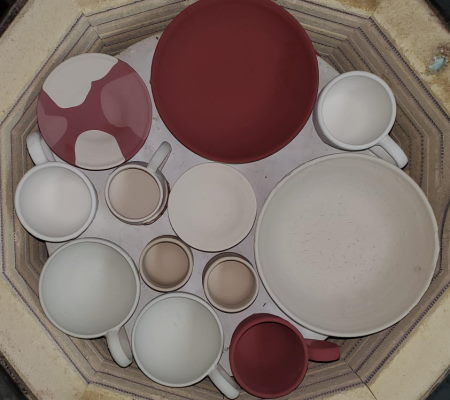
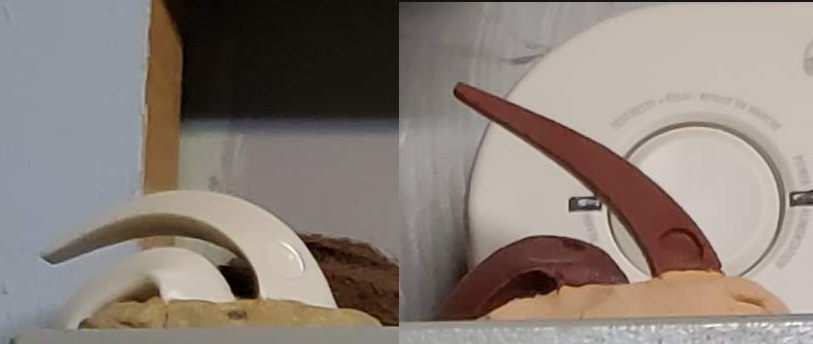
At about 750 degrees I close the lid, and at 1450 and 1750 I close a peep hole. At about 2000 degrees I will begin checking the cone packs - the temperature sensitive 'canaries' sitting just inside the peeps. The cones start out straight up and down, and bend as the kiln approaches the final temperature. There are different cones for different temperatures. The brown ones (below) are for the bisque firing, and bend at about 1950 degrees. The white ones are for glaze, and bend at about 2190. They are used in pairs, with a lower temperature (or a lower "cone") on the left, to bend first. We watch them both to see the progress.
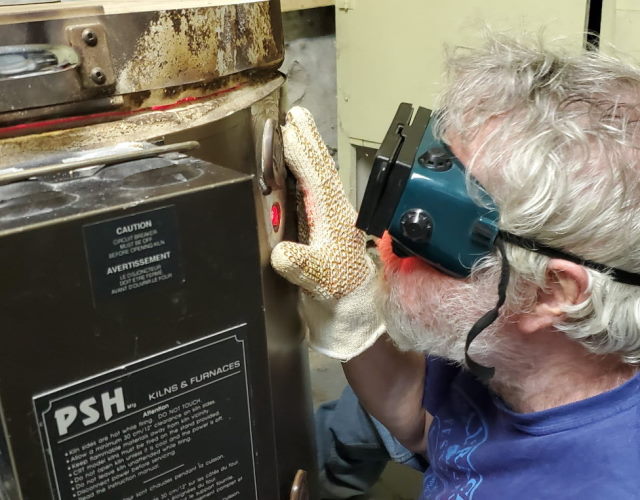
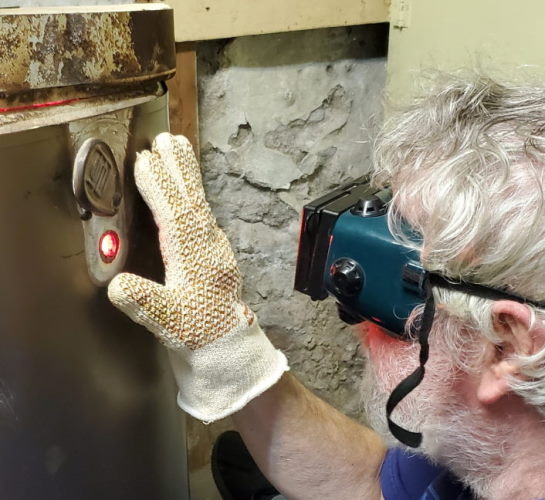
I put on the welding goggles and the gloves, open the peeps, blow very hard to disperse some kiln gas, and try to see if the cones are bending. At about 2170 I will stay in the 100 degree basement continuously, watching and waiting, until I think the cones are bent just the right amount, at which time I will switch the kiln to a slow cooling step. Too little heat and the glazes will not develop properly. Too much heat and they may change their look or even run right off the pot, necessitating a visit to the Dremel tool, or the grinding wheel, with its special diamond disc. After about 17.5 hours I'll throw the breakers, take the fan from the window, and head to bed.
That's it. Now we wait 20 hours to open the kiln and marvel at the transformations. I also shake my head at how much room there is, since the pots will have shrunk by 10%! A shelf that I spent 30 minutes on, optimising pots a millimetre apart, now looks like a no brainer. So it goes.
Late tomorrow we'll empty the kiln, and close the lid on another busy pottery season. Lori will likely do a round for Christmas orders, and then a friend and I will tackle the element replacement. I'll refurbish the shelves - remove rogue glaze bits, add a smooth coat of kiln wash - over the winter, and we'll be ready to go again come the spring.
I hope you've enjoyed this look behind the scenes at a potter's life, and now appreciate that mug you admire even more!! See you at the Frederick Art Walk on the weekend!!
Part 7. Epilogue.
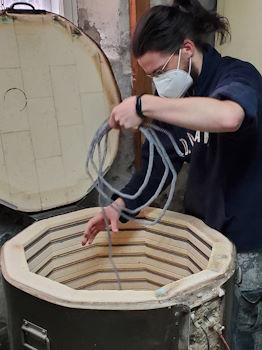
It never rains, but it pours. Right? Helper Luke and I did the element replacement in the early summer, and it took two of us about half a day. There are 6 elements in the kiln, and the top and bottom ones are special; a different size wire to produce more heat at the top and bottom. It went quite well, and when we were done we powered the kiln up just to make sure that we could. Success! While it was running, we checked the currents through the 2 circuits (120 Volts each), and they were running at about 45 Amps. The old ones were only drawing in the high 30's and hence putting out less heat, so that explains the longer firing times. Luke and I powered things down and took a well deserved rest!
New elements should be oxidized via a test firing. Basically, you do the equivalent of a bisque fire with an empty kiln. There is a preferred schedule of temperature rises and holds to follow. I programmed that in, and pressed Start, and went about my day. When I checked in a couple of hours later I found the kiln was completely off! Oh no! What's happened?
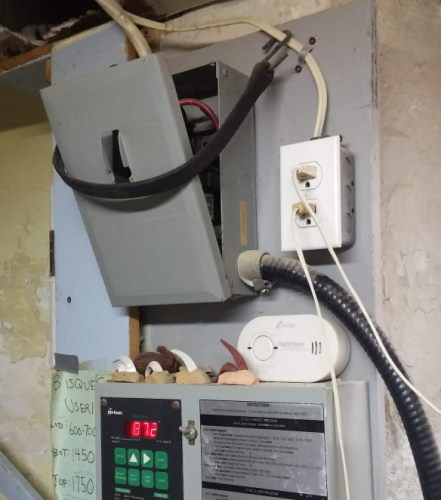
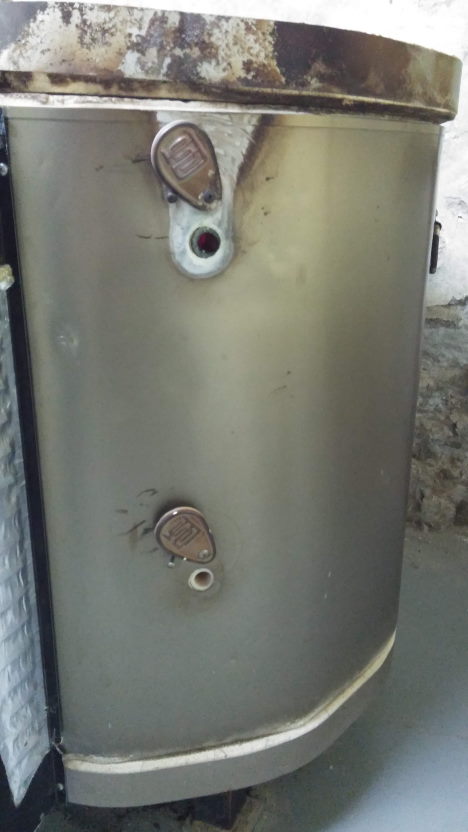
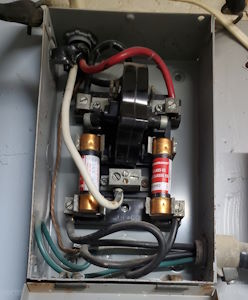
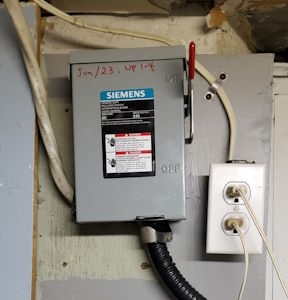
Our kiln is powered through a 240V 60 Amp disconnect box on the wall. The thick 4 conductor #6 wire (the same as a stove uses) runs from our house breaker panel to this disconnect, which divides into the 2 circuits, each with a big cartridge fuse. The box itself has a big On/Off toggle in the middle. You can see a couple of pictures of the box and its fuses in the section above and just below. Well, it turns out that one of the fuses had done its job, and blown. Apparently these fuses, installed about 10 years ago - were strong enough for the old current draw, but just couldn't handle the 45 Amps we were using now.
Fine, I was prepared, and had 2 new cartridge fuses standing by. I figured that if one blew the other wouldn't be far behind, so I proactively replaced both. Then I switched on the big toggle switch.....and felt it go sideways. Literally and figuratively. The switches in these boxes aren't meant to be operated a lot, and after a dozen years the darn thing broke, in exactly the same way as the one it had replaced. Can you feel the dominoes falling?
It gets better. These disconnect boxes were once very common, but now, not so much. Yes, I could get a similar one, for several hundred dollars and a few weeks wait. I did some research and learned that the fuses were not really required, since there are breakers already safe-guarding the circuit. That lead to a few other alternatives, which were smaller, and cheaper, but which no longer accommodated the big wire bundle to come in at the top of the box. We bit the bullet and bought one of these, and with some great difficulty - 4 conductor #6 cable does not like to bend - were able to install it. It's a little crooked, because the darn wire just would not cooperate! But now we had a kiln again, and we completed the test firing. YAY!!
Lori had a backlog of pots by this time, so we rather quickly did a bisque firing and glaze firing, and enjoyed the reduction in firing times! The glaze firing dropped from about 17 hours to just over 15. Thank goodness we are back in business, and Lori can begin throwing in earnest, for the big pottery sale is only two months away!!
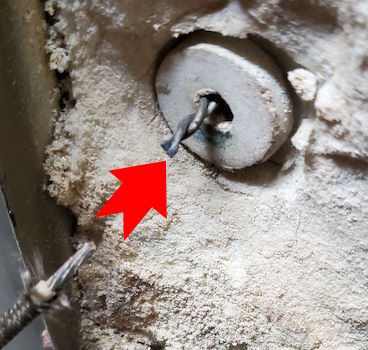
Yesterday Luke came over and planned and loaded his first bisque kiln, under our watchful eyes. He did all the lifting of shelves in and out, for which my back was very grateful. It was very full, and we managed to get almost every piece in. While we were loading it, I (repeatedly) pointed out the thermocouple. This is a temperature probe that sticks about an inch into the kiln from the gutter, about halfway down the wall. It's expensive and delicate, and essential to the kiln's operation, and every time you lift a shelf in or out, or place a pottery piece near it, someone says "Watch The Probe!". It's kind of a mantra that gets chanted a dozen times per loading or unloading. Yesterday I added "you know Luke, that probe is looking pretty long in the tooth. Maybe we should have replaced it, too."
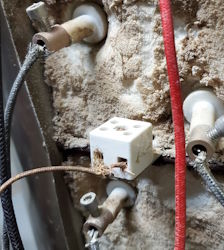
Today we fired the bisque kiln, and you can guess the rest. At least the probe had the decency to fail at the beginning of the firing, rather than after the kiln was at some ridiculous temperature. I took the gutter apart and spent a couple of hours fighting with a melted screw, getting the old thermocouple out of the white ceramic block (see picture) and putting a new one in. By 11:30 the kiln was on again, and right now it is approaching 1700 degrees. I don't want to say that there are no more electrical bits that can fail - the gutter is FULL of wires and relays that could decide to quit at any time - but as of tonight all of the usual suspects have been replaced.
And I can sleep a little bit sounder. But every pottery season I know that such things may happen. I'll be ordering a new standby thermocouple in the morning!
Post Script. About 3 weeks later, in the middle of a glaze kiln, one of those wires that I (foolishly) said hadn't failed since we added cooling in the gutter decided to end its life by burning off from it's connecting block. That took down 2 of 6 elements, and the kiln couldn't get up to final temperature in the bottom half. In my younger days I would have tried repairing the wire on the fly with the kiln hot, but with age comes a certain amount of wisdom, although apparently not enough to avoid tempting Fate! After the kiln cooled completely and was unloaded it took about an hour to fix. Most of the pots turned out okay, but a few didn't develop their glazes, and Lori will try firing them again, with fingers crossed. Never a dull moment.